From blueprints to colour selections to after-sale care, our team of professionals are available to offer advice and walk each purchaser through the home building experience with Terra View.
We have constructed a guide to lead buyers through the path to homeownership – explore it now.

Selecting ideal locations for our new home communities is always of utmost importance to us. We believe the best communities offer homeowners the perfect culmination of comfort, convenience, lifestyle and leisure.
Explore what Guelph has to offer you!
Congratulations on your Terra View Home purchase! We are delighted that you entrusted us to construct your next family home. It is an exciting time and you may have questions about the next steps. Our team of highly skilled and experienced staff are here to assist and guide you throughout the entire process. Once you have “firmed up” on your Agreement of Purchase and Sale, please refer to the “After Purchase Next Steps” document as it outlines the required meetings that will personalize your home. For further inquiries you are welcome to contact our Customer Care Liaison (customerservice@terra-view.com).
A scheduled Pre-Drywall Inspection with each homeowner is conducted at the stage in construction when the house is mechanically roughed in, prior to installing the drywall. You will be contacted by our Site Supervisor or Customer Care Team to arrange the date and time. This is an opportunity for you to view your home while under construction and allow you to verify the placement of selected items such as phone and cable lines. The placement is decided in the Pre-Construction Review meeting with one of our Sales Team members. Therefore, this should not be viewed as an opportunity to change or add items. For a detailed description please refer to the “After Purchase Next Steps” file.
The Pre-Drywall Inspection is an opportunity to verify with our staff that all items selected and installed behind the walls are installed in the preferred locations. It is not an opportunity to make changes. At this stage the home is already mechanically roughed in and drywall installation is scheduled. Any alterations at this stage can cause a closing delay and additional costs to the homeowner. If a request is made, we can look into the feasibility of accommodating the change, however, such requests may be denied. If changes are approved, you may be subjected to additional installation costs and administrative charges.
We recommend that you proceed with rough-ins and walls in the basement and delay the drywall installation for up to a year. This ensures that the basement concrete is as dry as possible. Elevated humidity levels in a new basement should be monitored. Finishing the basement during the warranty period may impact the Tarion coverage. If we need to gain access to anything behind the drywall, we are not responsible to restore the finishes installed post-closing or any secondary damages to the building or your possessions. In addition, if electrical or plumbing has been altered from the original systems and causes an issue it may not be covered under warranty.
Many homeowners opt to fully rough-in for an additional dwelling unit as this completes the most important aspects of this flexible space, preparing it for a future additional living space or recreation room.
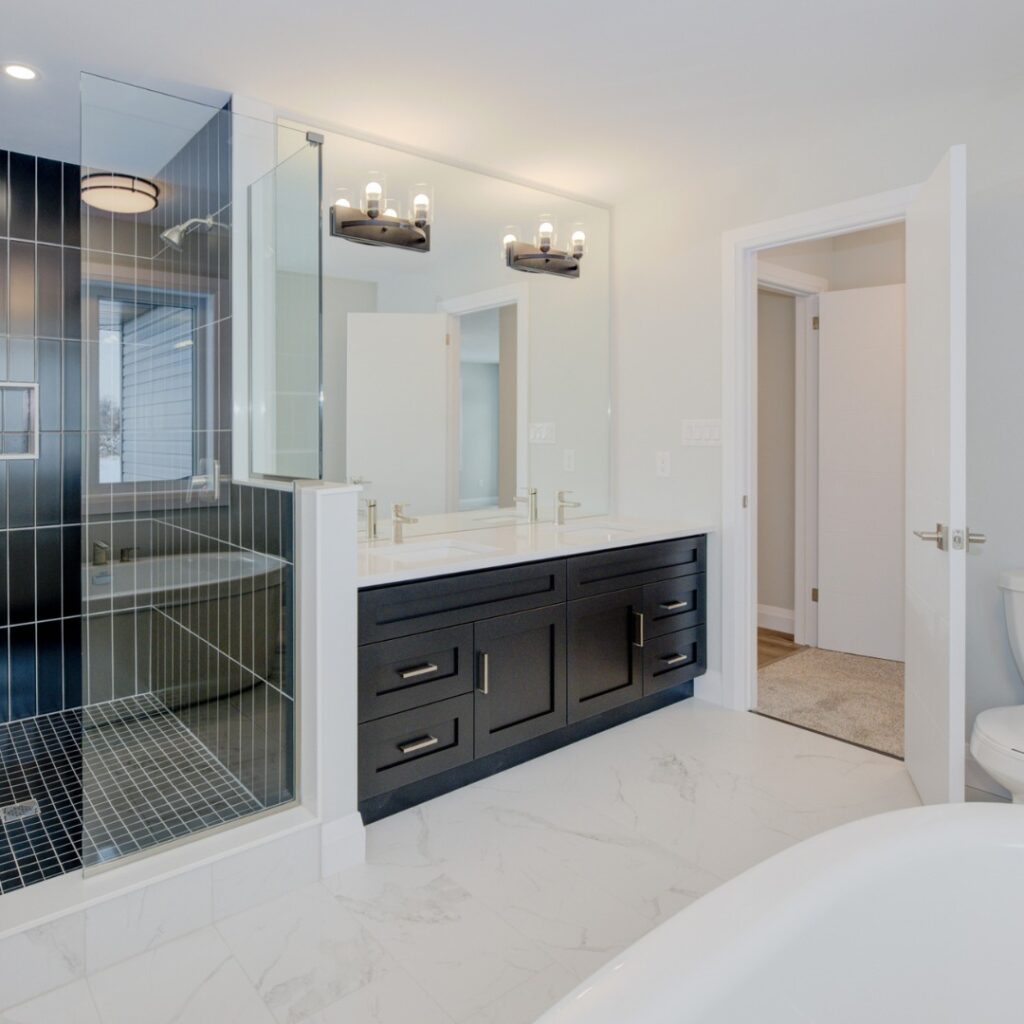
Terra View has a wide variety of floor plans and elevations to select from, although we do allow purchasers to modify the plans to meet their particular wants and needs (within reason). We also offer a wide variety of options when it comes to material, lighting, finishes, windows and colours. A Terra View Home is unique as each plan is ultimately tailored to the homeowner.
It is not possible to move in prior to the closing day. There are legal transactions that occur on the date of closing which involves the lawyers, the bank and the Land Registry office. It takes time for all the parties to complete their respective tasks. Our lawyer must confirm the property has legally changed to your ownership before handing over the keys to the home. For a detailed description please refer to the “After Purchase Next Steps” document.
An Energy Recovery Ventilator (ERV) exchanges the energy and moisture contained in exhausted air and transfers it to the incoming outdoor air or vice versa. It functions similar to a Heat Recovery Ventilator (HRV), but in addition to recovering heat it transfers moisture between the exhaust and supply air stream. Therefore, the ERV has the ability to maintain indoor humidity levels in the winter and reduce the moisture from the outdoor air in the summer. Our homes are built exceedingly tight and as such require a source of fresh air to maintain healthy indoor air quality. Older inefficient homes rely on a leaky building envelope to allow air changes to naturally occur around windows, doors and wall intersections. The ERV is located in the mechanical room and contains a heat/cool recovery core and air filters. The control for the ERV is located beside the thermostat on the main floor and the amount of fresh air ventilation can be adjusted. Please refer to the owner’s manual.
Every 6 months, the ERV unit requires the filters to be removed, cleaned and reinstalled. The recommended maintenance includes removing the core (box mounted in the middle of the ERV on an angle) to rinse it out with a stream of water. First simply unplug the unit, as the power needs to be disconnected prior to opening the access door. To access the inside of the ERV there are either two latches on the bottom edge of the box or two screws near the bottom edge which will need to be removed. Once open, the door is hinged on the top and will swing up allowing access. The two filters should be rinsed out with water, dried and reinstalled – not replaced. Please refer to the Manual for additional information.
These types of heaters are typically 30% more efficient than a standard hot water tank type heater. It is called on demand as it only produces hot water when there is demand. Do not be concerned if there is a slight delay in hot water reaching the faucet, this little bit of unused water is a minor loss compared to the inefficiency in the tank style heaters.
Drain Water Heat Recovery Pipe (DWHR) pre-heats the incoming city water by cycling it around a copper outgoing pipe. This reduces the domestic hot water demand because the water requires less energy to heat it to your desired setpoint. The outgoing water loses its heat to the incoming water and can raise its temperature by 5o‑Celius. This reduces the energy required to heat the water being consumed as the water is somewhat pre-heated. There are no moving parts in the DWHR and it requires no service. Therefore, it is a passive system saving you money every time you shower. It should be noted that it does not work if one is bathing as there is no hot water generally being consumed while soaking in a bath, and no drain water is leaving the tub until the bath is emptied.
The device is an air source heat pump — it is a dual-purpose device providing heating and cooling. In the winter, a heat pump extracts heat from outside air and delivers it indoors. On hot summer days, it works in reverse, extracting heat from within the home and pumps it outdoors to cool the indoor space. It uses a compressor/condenser unit that is connected with refrigerant-filled tubing to an indoor air handler. Heating is supplemented on colder days lower than the thermostatically controlled setting so the device can run at its optimal efficiency for the majority of the year. The device is not oversized to meet the highest demand for heat, which is the common design for furnaces. Therefore, on particularly cold days the furnace will switch on to meet the heating demand, and is more economical for the homeowner. There is a considerable energy multiplying effect with heat pumps making them more efficient than a standard gas fired furnace.
The ACH is an indication of the air leakage/tightness of the building envelope. Getting this number below 1.5 air changes per hour is a requirement of labeling a Net Zero Ready home. A third-party consultant performs a blower door test on each home prior to closing to confirm the home’s ACH. This process involves installing a door with large fans that are capable of putting the home under immense depressurization. As the air is forced out of the home the amount of air able to leak out is measured. A code built home generally allows 5 uncontrolled ACH while an Energy Star-built home must be under 2.5 ACH. A Net Zero labeled home must achieve 1.5 ACH as a minimum. The tightness of the envelope is important as it impacts the heating and cooling energy demand. The amount of uncontrolled air that moves through the home must be replaced with heated/cooled air and this places a higher demand on the HVAC system. Therefore, air leaking out of the building is the main cause of high energy bills. Additionally, it drastically impacts the durability of the building as air leaking in/out brings moisture with it which can condense within the walls and on windows. A leaky building can also allow unwanted pests and insects into the home. To further improve air quality, it is recommended you use natural products while cleaning your home. To ensure adequate air changes, the home relies on the far more efficient ERV as mentioned earlier.
Exterior taps are subject to extreme cold temperatures during winter months. To avoid frost damage and burst pipes the water connection should be shut off inside the home in the fall by the homeowner. Locate the exterior tap and then find the pipe in the basement. There will be a “shut off” valve located in the basement near where the pipe exits the wall. The valve may have ended up hidden by insulation but will be evident once this small amount of insulation is pulled back. Please ensure the insulation is reinstalled for the winter months as it forms part of the home’s complete exterior insulation layer. Once closed off for the season, open the exterior valve to allow for any water in the line to drain. In the spring, the shut off valve should be opened for the exterior tap to function.
Concrete shrinks upon curing and this is expected. We do saw cut the basement slab to allow for cracking to happen in areas where cracking is expected to occur, but sometimes the concrete cracks outside of these control joints. The basement has been completely sealed from the ground beneath using high density foam so soil gasses cannot enter your home through any cracks that may appear in the slab. If for aesthetic reasons you wish to address them, just fill the cracks with caulking prior to or at the time that your basement is being finished.
The concrete when poured for the foundation and floor slab contained a lot of water and will continue to dry out over the first year following construction. Other materials also contain water during the building process. The ability for materials to dry is greatly increased through the running of the dehumidifier. The dehumidifier can be directly drained to the floor drain to avoid the need to empty the tank and for the unit to drain as needed.
A Net Zero Ready home requires an advanced building envelope with very high insulation value, low air infiltration and an optimized Heating Ventilation and Air Conditioning (HVAC) system design. These three features are designed to influence one another to enhance your home’s thermal comfort by reducing drafts. The high insulation values and low air leakage means the HVAC system does not need to work as hard to compensate for drafty corners of the home. This means the mechanical system is designed to be the “right size” for your home. Terra View homes have mid-velocity ductwork with variable speed fans that provide continuous air flow — rather than standard ductwork with an intermittent fan that by design requires an oversized furnace and air conditioning system with reduced cycle time. In conclusion, if you adjust the temperature on the thermostat, it will take the conditioned air longer to reach the set point.
The lumber used to construct your home had higher levels of moisture content when installed as lumber is exposed to the elements as was your home during construction. As the studs dry this can force the nails/screws used to “pop” off the drywall mud used to cover them. This is completely normal and can be expected to occur at random places in a new home. It is part of what is termed “settling” and will drastically diminish over the first year. Following the first year, applying a fresh coat of drywall compound over the nail head and repainting will restore the wall finish. It is best to allow the settling to occur prior to you painting the home with decorative colours.
Over the course of the first year especially, your home will slowly dry out and settle. During construction, the home has been exposed to the elements and a lot of water is used in construction materials (i.e., concrete and drywall). As the materials dry, the wood shrinks a small amount and the stair stringers will “pull away” from the wall they are against. This is normal and can be repaired with a bead of caulking.
To avoid any damage to the finish on your hardwood stairs, only a mild solution of warm water and mild dish soap should be used. Using a damp cloth, gently clean any dust or debris from the stairs. Make sure to dry the stairs thoroughly using a microfibre cloth. If any liquids are spilled on the stairs, they should be dried immediately as water can soak into the finish leaving the wood swollen or causing an unsightly, cloudy stain. Note that hard surfaces can be slippery when wet! Please use caution if you are walking over a wet area. Do not use any products with silicone ingredients to clean or shine your stairs (ie. furniture polish) as this can leave a wax-like finish on the stairs and make them extremely slippery. If you find the stairs are slippery especially in socked feet, a carpet runner can be added down the flight which not only protects the wood but provides traction.
The kitchen and bathroom cabinets installed are designed to compliment your home. It is recommended for them to be cleaned with a soft cloth and solution of warm water and a very mild soap. Extra care should be taken when mopping flooring around the island and all lower cabinetry, and any excess water should be dried up right away to avoid the bubbling of materials.
Cleaning:
Pro Tip: To remove stubborn sticky materials like glue, or any product that has hardened, use a razor blade tip or 000 fine-grade steel wool.
Sealing: It is recommended to purchase a natural stone sealer. Typically, they are easy to apply as it requires a wipe-on, wipe-off technique, similar to how you might clean any countertop on a daily basis.
Scratches/Chips: Stone is resistant to cracks, chips, scratches, and stains; however, like most materials, excessive force and/or pressure from objects can damage the surface. The most common area for chipping is around the sink area, as this area has such high use. We do not recommend standing or sitting on your counter as this could risk cracking or chipping.
Etching: Etching is a chemical reaction caused by a liquid substance making contact with the surface of the stone (i.e., household cleaners, orange juice, coffee, vinegar, wine, tomato products, mustard, and many soft drinks). In some cases, etching spots can also occur from water splash due to the minerals and chemicals in the water. This reaction eats away the polish of the stone, leaving a dull or light-coloured spot.
Heat: Hot pots from the stove can be placed directly on stone without any problems; however, if cooking with oil, we do not suggest placing the metal pans directly onto the countertop, as the metal of the pan may be beyond the thermal breaking point of certain stones.
The installation of sod is a seasonal item and is dependent on the growing season. Even though the temperatures in the spring might have you thinking “where is my sod,” sod is a farmed crop. It cannot be cut to be relocated to your lot until it has an opportunity to grow and the crop must be dry enough for the harvest equipment to operate. To allow for lot grading to be sculpted on your lot as required by the City, we will often wait to install sod until the adjacent homes are ready. Each lot is graded to match the grades of the neighbouring lots, allowing a seamless transition.
The sod has been cut at a sod farm and transplanted. To re-establish the fresh sod requires extensive daily watering for a few weeks to regrow its roots into the topsoil. It is recommended to water up to an inch a day for the sod to prosper. The sod is not under warranty as it was living when laid, therefore the ability to become established is up to the homeowner. Should the sod start to brown due to lack of water please increase the watering amount and frequency to encourage its growth.
Over several months the gravel driveway will settle which is necessary prior to paving. The installation of paving is seasonal and will occur spring, summer or fall – weather depending. We mobilize the contractor when there are a number of driveways to be completed due to the amount of equipment needed for this to occur.
You will be able to fence, install other structures, and landscape your lot once the final grading is approved and a clearance letter is granted from the city. It is recommended to check with our Customer Care Team to confirm prior to conducting any work. To match the approved plans we may need the ability to run equipment between homes, requiring a fence free area around the perimeter of the lot. Once graded, sod is laid, and a surveyor inspects and verifies grades and produces the clearance letter that must be acceptable to the City. Only then are homeowners able to install fencing or other structures not requiring a permit and landscaping.
Please be advised that under no circumstances are you allowed to alter the overall grading plan or block drainage of your lot. This is especially the case along property lines. Altering lot drainage can lead to property damage on your property and on your neighbour’s. If you do alter the lot drainage, the City will get involved to ensure compliance at your cost and it is possible you may be liable to your neighbours for damages as a result of grading alterations.
The City-held contract for the servicing of the site for the curb completion and the final coat of paving is triggered when the phase of development in which your house is located is deemed “substantially complete.” Typically, this is when approximately 90 percent of the homes are constructed however, entire phases are not necessarily fully paved at once.
The windows installed are triple pane and much more resistant to heat transfer than single or even double pane glass, however, triple pane still does not have the R value of the home’s walls which means the glass is a cooler surface than the walls in the heating season. If the humidity levels in your home reach the “dew point” and proper circulation of air around the window is not maintained, the humidity within the air can condense on the cooler surface. Your new windows have a much lesser chance of this happening than other windows. Keeping blinds down is not recommended and will result in the glass being allowed to cool to a much greater extent leading to increased risk of condensation.
The tree planted on your lawn was “plucked” from a tree farm and experienced stress during its transplant. The tree needs to re-establish its roots in the new soil, therefore requiring an abundance of water in the first few months. Some homeowners find success by placing a hose by the tree and will turn it on to a trickle, leaving it there for many hours a few days a week. Additionally, it’s recommended to create a circular berm around the base of the tree to hold water. Sufficient watering will allow the tree to grow new roots and will ensure that the tree thrives in its new location.
Terra View Homes has compiled a variety of comprehensive resources and information that will help you care for your new Net Zero/ Net Zero Ready home for years to come.
Learn more about the Tarion Warranty included with your Terra View home purchase, plus our home care resources.
T: 1 (519) 763-8580
F: 1 (519) 763-7296
Site By: Orchard Design